

Irrigation Installation
Design, Challenges & First Steps

Late summer and fall of 2025 had us beginning the irrigation installation after months of prep work. If you want the full backstory, here are earlier posts in this series - or feel free to jump ahead to the installation details below:
Well drilling:

Well house construction:


Solar pump installation:

True costs:


Irrigation Design
Anyone can slap some tubing together or run a few hoses, but running long irrigation lines - especially across uneven terrain - gets tricky fast. Elevation, pressure, and flow rates all matter when you’re trying to deliver consistent water to every plant.
To get it right, I worked with Craig Pisarkiewicz at MPR Supply, who has decades of experience designing irrigation systems for farmers. We handled everything by phone and email as he was able to access terrain maps remotely. Craig’s guidance on irrigation zones and weekly runtimes was especially helpful.


Pressure & Water Storage
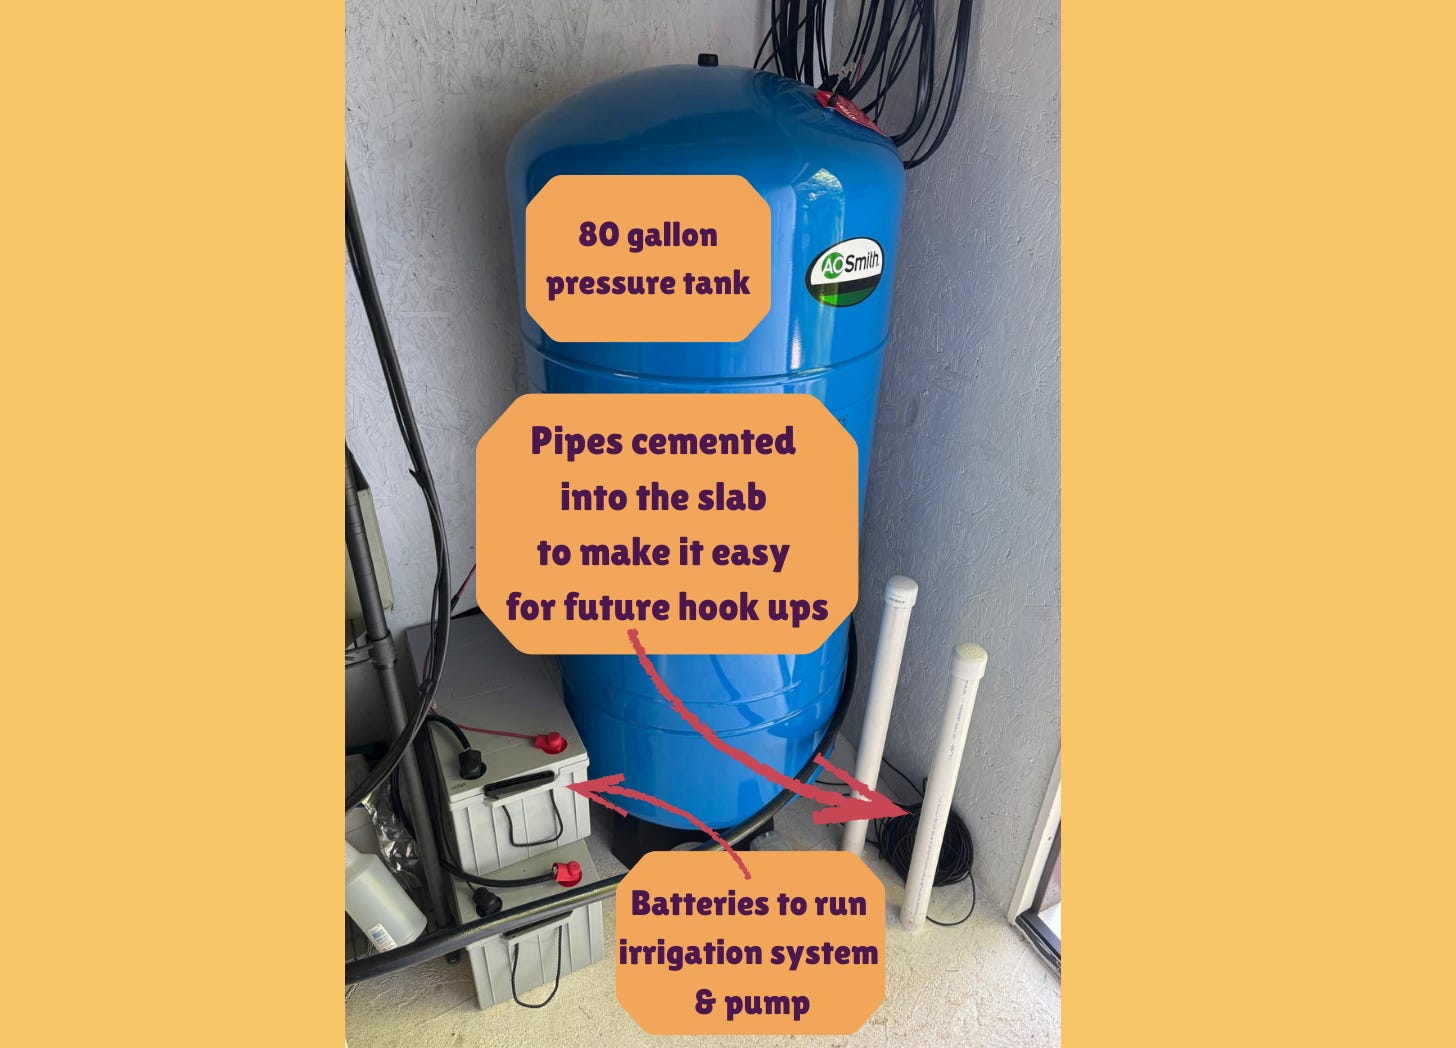
The irrigation design calls for 10-18 gallons per minute, but our well only produces 4 gpm. To buffer the system, Ben installed an 80-gallon pressure tank and made a key adjustment to the design. On the east side of the larger elderberry field, he plans to tie the system into our 1,000-gallon bathhouse water tank. Since the tank sits 25–30 feet uphill, it will function like a gravity-fed water tower, naturally boosting water pressure across the system.
Once the “water tower” setup is complete, we’ll measure actual flow rates in each irrigation zone to see how much improvement we get. If pressure or volume still fall short, we have the option to add a cistern for additional storage and supply stability during peak irrigation windows.
Ben’s plan has two big benefits:
The water tank will auto-fill, ending our need to haul water in for showers.
The elevation will increase irrigation pressure

Trenching
We rented a 13” landscape trencher, and wow… it was a beast. Uncontrollable & dangerous, actually. The machine would take off on its own, cutting a chaotic path, and neither of us could safely reach the off switch while it was bucking around. For a bit we thought we’d have to return it.
After experimenting, we discovered we could control it only by running it backward - leaning away from the machine to counter its momentum. Ridiculous, but it worked. Ben and I traded off every minute to deal with the vibration and physical effort.

We dug everything to about 4 inches deep, just enough to bury the flexible PVC and electrical lines.
Originally the design called for rigid PVC, but Ben made the executive decision to switch to flexible - cheaper and easier to transport to the farm. It’s finicky, though: it must be unrolled in a way that keeps it lying somewhat flat instead of springing into wild coils. We used landscape pins in a few spots to hold it down until we could fill the trench.

Of course, this introduced an unforeseen issue:
A resident mole now uses the trenches as super-highways.
He happily tunnels through the softened clay, and I routinely have to re-compact the soil. Time will tell whether flexible PVC can withstand curious wildlife.

Necessary Tools
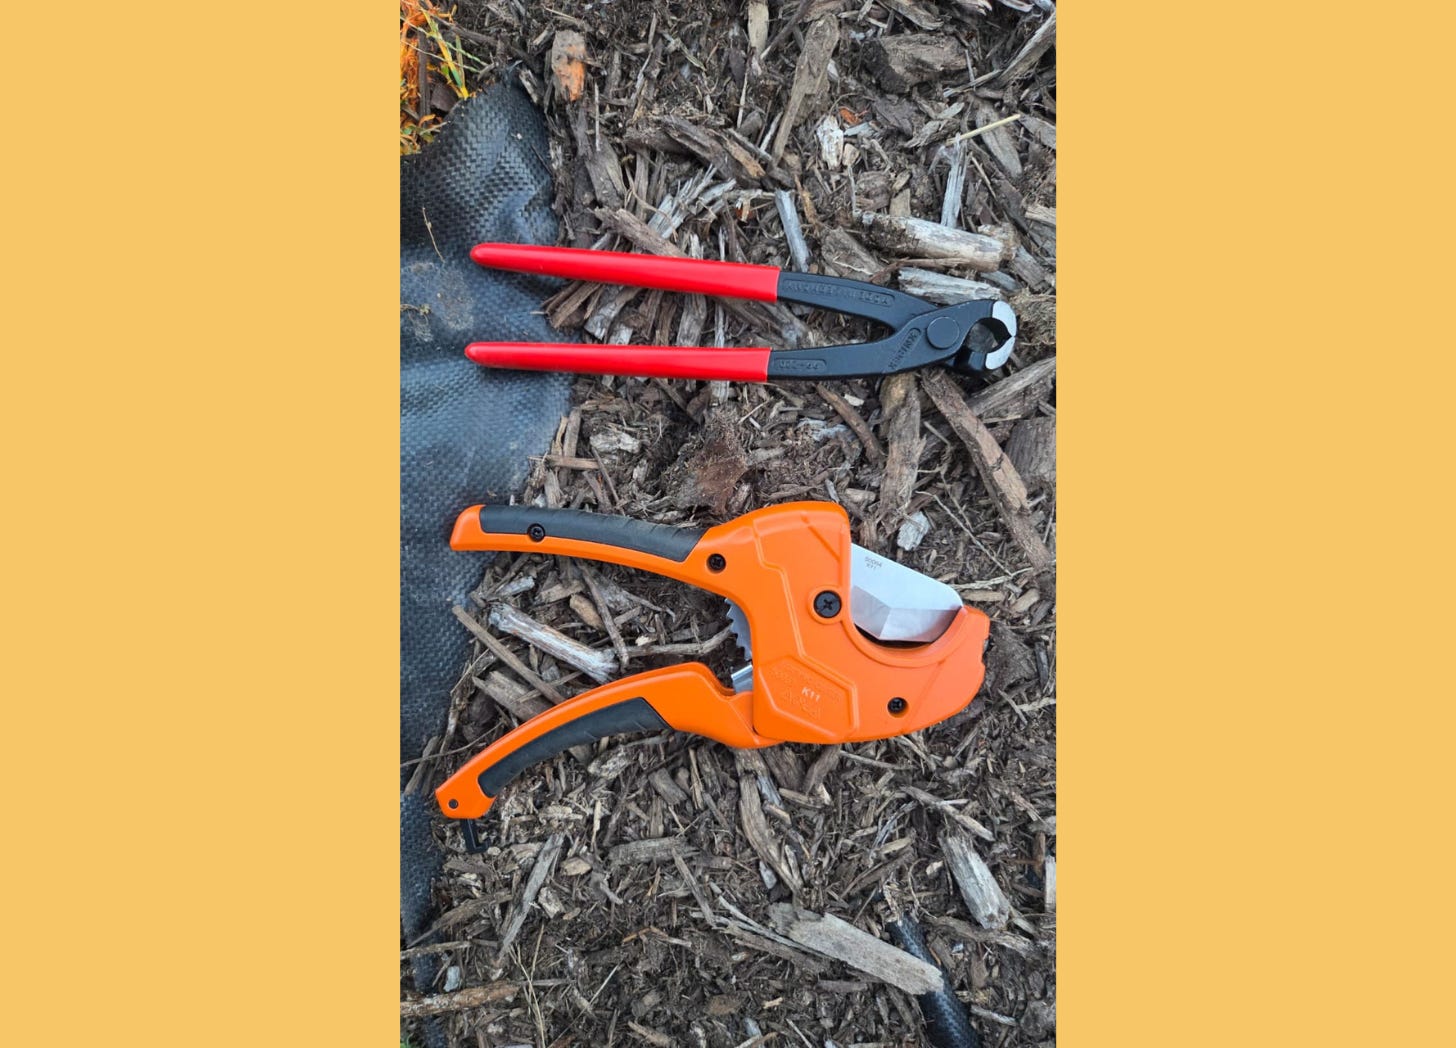
These two tools were absolute workhorses during the project:
Concreter’s Nippers: for cutting and twisting wire
PVC Cutter: saves your hands - worth the investment
Pipe Connections


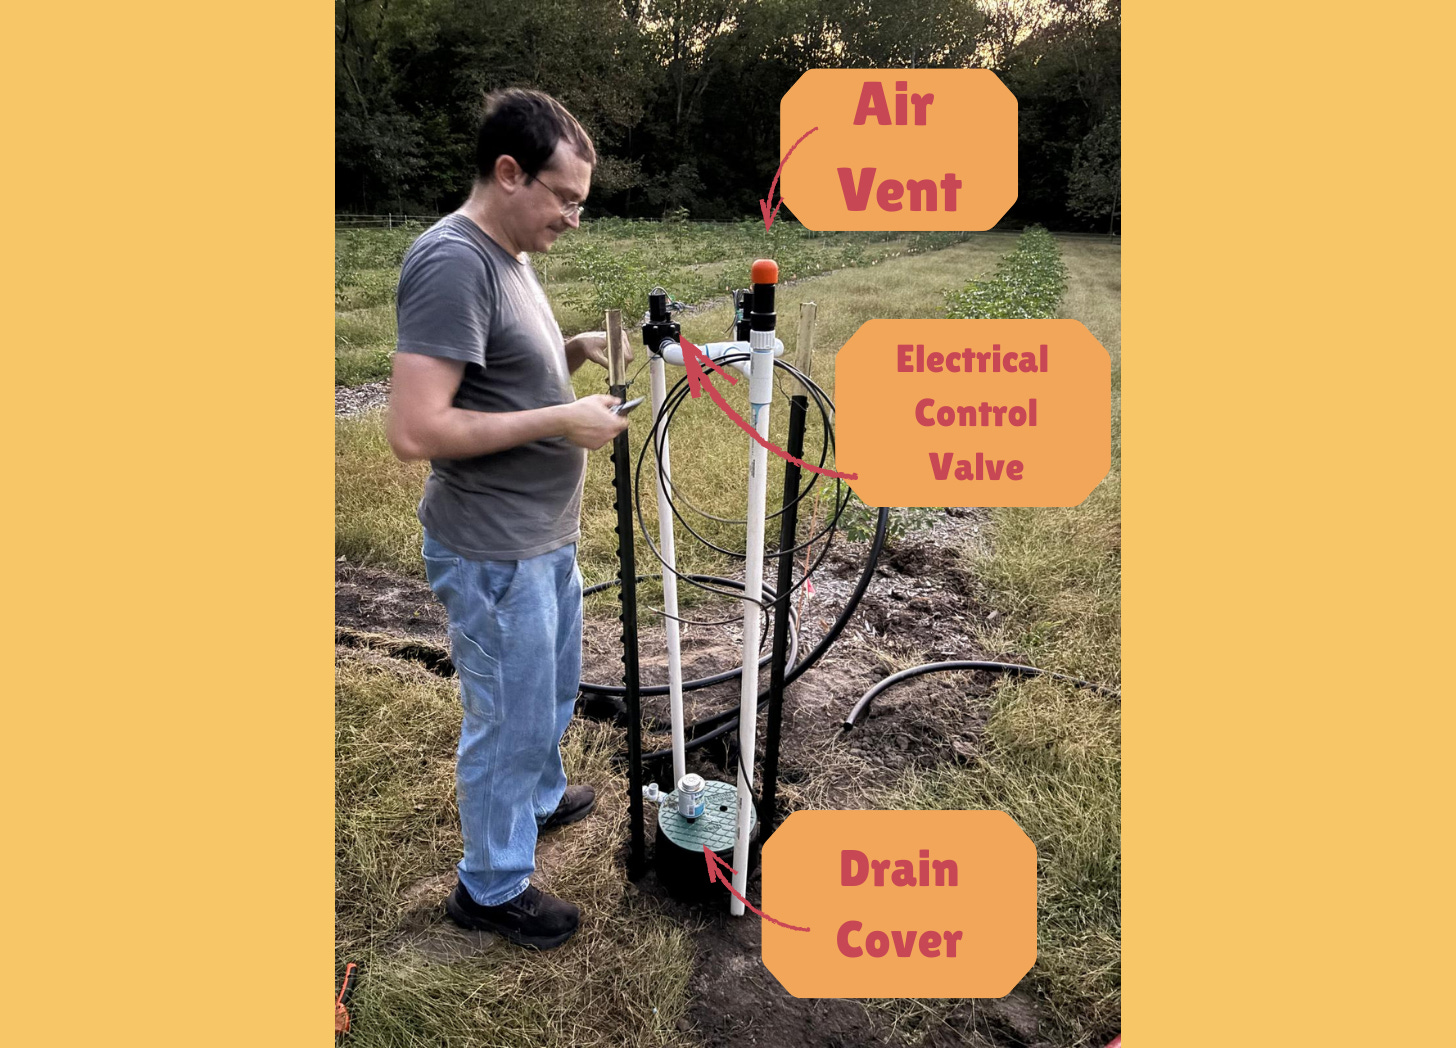
Zone Valves, Vents & Drains
After the trenching ordeal, neither of us had the energy for more digging. So we accepted a compromise: the drain valves are not on grade - they stick up a few inches. They’re located next to the vertical PVC vent pipes, and we added t-posts around them to prevent accidental damage during field work.
We spread pea gravel beneath each drain valve to help with water dispersal.


Emitter Lines & Orchard Tubing

Once the main infrastructure was in place, I pulled orchard tubing down the elderberry rows, weaving between plants. After that, I replenished the mulch - adding organic matter and protecting the tubing from UV exposure.

Next Steps
Winter arrived soon after we wrapped up this stage, so the remaining work will wait until spring. Ben plans to:
Add a water hydrant at the east side of the larger field
Hook up the water tower
Finish setting up the electrical controls
More updates on those pieces in a few months!

